Saturday, December 24, 2016

DIY Dollhouse Style Bookshelf


So I built the decorative wall shelf and was going to donate it to charity.  Because Christmas.

Then My 4yr old daughter saw it and thought I was building it for her.

I was about to explain to her what my intent was but then I realized that I had already built her brother a shelf of his own  and her older sister a bookcase.

So I guess it stood to reason she would assume that project would be hers.

I decided to not break her heart and go ahead and mount it for her on her side of her bedroom.

At the end of that video you can see how happy she looked.

Priceless.

However,  I will not let it stand that she would have something that truly was not built specifically for her.

So with great thought and care...

Daddy shall build this for his little girl.

DIY Dollhouse Style Bookshelf


Materials

2 - 1x8s

NOTE: All board lengths are 8' long and 3/4" thick unless otherwise noted.

Choice of Stain


Cut List

1 Bottom Shelf @ 7.25" x 24.5"
 
2 Sides @ 7.25" x 24"

1 Middle Shelf @ 7.25" x 24.5"

1 Lower Vertical Divider @ 7.25" x 10.5"

1 Upper Vertical Div ider @ 16-13/16"

1 Roof Side A @ 7.25" x 18-5/16"

1 Roof Side B @ 7.25" x 16-5/8"

1 Chimney @ 1.5" x 1.5" x 3-5/16"

Cutting Diagrams

1x8s


Step 1

So lets start with the bottom and work our way up.  Cut it to length on a miter saw IF...

you have one that slides.  A regular 10" compound miter saw will not have the cut capacity to handle a board 7.25" wide.

I have an easy jig to build for a circular saw that will make short work of cutting a board this wide.

Then route a 3/4" dado for the vertical divider.


Step 2

Now cut the middle shelf to length in the same manner and route its dadoes.


Step 3

The lower vertical divider can be set and glued in place and immediately move on to step 4 without letting the glue dry.


Step 4

Set the middle shelf in place and use a couple 90 degree clamps to keep the two shelves perpendicular to each other.

Then apply straight clamps to secure the three pieces and allow the glue to dry.


Step 5

The two sides can be cut while the glue is drying.

The side pictured on the RIGHT below gets a 30 degree angle cut in the top end.

The side pictured on the LEFT below gets a 40 degree angle cut in the top end.

NOTE: I'll explain the reasons for the two different angles in the Final Thoughts section below.

A couple dado get routed in both sides so they can be attached to the shelf assembly.

The bottom dado is 1" up from the bottom of both sides.  Then measure a 10" distance between the top of the bottom shelf and the bottom of the top shelf.


Step 6

The upper vertical divider is cut to length and gets a 30 degree angle on the top end.


Step 7

No dadoes for the roof pieces.  However Side A gets a 20 Degree angle cut on one end.

Lay it in place with a line of glue and move on to step 8.


Step 8

Lay Side B in place with a couple lines of glue and clamp in place.

I use a band clamp for odd jobs like this.


Step 9

Once the glue for the two roof pieces are dry you can remove the clamp and add some 1/4" dowels to each of the glue joints to add some strength and visual appeal.

Finally the chimney is options if you want to add some flare.  A scrap piece of 2x2 with a 30 degree angle cut on one end can just be glued in place.


Final Thoughts

Why the different angles?  Why not design the project to use the same angle throughout?

Well the answer to that is aesthetics.

I wanted the roof to not meet in the middle.  I wanted the projects symmetry to be cut into thirds.

In order to do that and get the roof to meet at about 1/3rd over and not have a roof pitch that was absurd, I needed to use different angles on either side.

If you need a simple and easy explanation on how to cut boards to length with angles, I just happen to have one for you.

Until then!


0

Friday, December 23, 2016

DIY Cutting Board


Growing up, I knew someone whose grandfather had been a butcher. In their home, there was an island in the center of the kitchen. This island was actually his Grandfather's antique butcher block top and it was still in use.

It was definitely used for more purposes than cutting food because in that old farmhouse, it was even an extra counter work space to prepare food.

Meanwhile, back at our home, all we had was one or two old wooden cutting boards. They had deep cut marks and were getting on in years.

Years later, those two well worn boards were pitched for plastic when plastic boards came into style. Our "new" plastic boards were fine until they also showed signs of cut marks.

I'm not into ingesting plastic, are you?

Again I found myself harkening back to those two wooden cutting boards and wondering why I'd parted with them.

Fast forward to today and those plastic boards are gone and we're back to using wood again. This time the boards are hardwood and so much better to work with.

If it's time in your home to update or replace those old cutting boards, be sure to ditch the plastic and get busy one weekend making your own DIY cutting boards.

These ones by Jeff caught my eye because I'm a fan of the mixed materials look. He used a mix of walnut, maple, and bubinga but be sure to go with what you've got available in your local area.

DIY Cutting Board:


Materials

Walnut, maple, and bubinga (or your choice of wood selections)

Wood Glue (Titebond 2)

Table Saw

Thickness Planer

Various Size Clamps

Orbit Sander

Router

Gloves and mask

Salad Bowl Finish


Final Thoughts

Working with the salad bowl finish means taking your time with several application coats and also sanding to achieve a great end result. Wear a mask to protect against any fumes and also use gloves to help with any stickiness.

I hope you enjoyed today's featured project and don't forget to stop by "Home Built Workshop" YouTube channel to check out even more great woodworking videos from Jeff. Don't forget to subscribe.

If you liked Jeff's project shared today, be sure to check out another simple and easy creation by Jeff here:

http://www.simplyeasydiy.com/2016/11/diy-rustic-toybox.html


Until then!


0

Tuesday, December 13, 2016

DIY TV Stand


Are you the type of person who wall mounts their TV or puts it on a TV stand?

We've had our TV displayed both ways. Right now our TV sits on an actual piece of furniture, a TV stand. It's serving us well.

The set up is great because we rely on our TV stand for a storage area. It can hold a DVD player, a game console, and lots of DVD's. Some of our school curriculum even resides there.

Like I said earlier we did have a time where we had the TV wall mounted. We still had our TV stand right below it. Why, you ask?

Visually, having it this way ensured the room appeared balanced and organized. Our home's living room was a long rectangular room which was broken up on one wall by an awkwardly placed door.

This meant placement of the couch had to be in one particular spot only. The small section of the wall left by that awkwardly placed door is where the TV had to be placed.

We don't have that issue in our current home, and the wall mounted unit is long gone.

We can rearrange the room's furniture if we wanted to. The TV is at the right height to soothe everyone's needs.

Ever noticed how there's always one person in the family who thinks the TV is too high and the other person thinks it's just right?

Yes, that conversation has happened in our home.

An option for you is to custom build your stand to the height that everyone can agree on. Also, I'm always looking for easy, affordable projects using 2x4's! Chad shares in his video that his project was only about 25.00 .

Talk about affordable!


DIY TV Stand:


Materials

Choice of Stain
(he used Dark Walnut)


Miter Saw

Table Saw

Pocket Hole Jig

Drill

Various size clamps

2 1/2 inc screws

2x4 material


Final Thoughts:

You could add some corner hardware/decorative bolts to each corner of the piece to enhance the final finish.

In our house, the area behind our TV stand gets dusty fast.  Why not add castors to the leg bottoms to ensure easy cleaning and possible future furniture rearranging?

We hope you enjoyed this great home furniture project from Chad DIY . Be sure to check out their YouTube channel for even more great woodworking projects from Chad. Don't forget to subscribe!

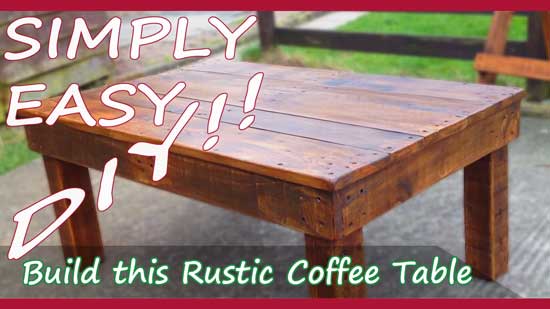
If you liked this project, then you will love this matching rustic DIY Coffee Table. Feel free to check it out! Until then!

http://www.simplyeasydiy.com/2016/11/diy-coffee-table.html


0

Monday, December 12, 2016

DIY Wooden Soap Mold


There are a lot of good reasons to make your own homemade soap.

1.  It's as natural as you want it to be.  The mass produced commercial stuff that you get at a store has all sorts of chemicals and harsh cleansers.  Chemical cocktails you might say. 

Some of them dehydrate the skin which ages it. 

They can cause allergic reactions and have been linked to certain forms of cancer.  (Correlation does not prove causation but it's enough to make me take notice.)

2.  Typically handmade soap is made of oils and/or butters that contain antioxidants and vitamins that may be absorbed by the skin helping to keep it healthy.

3.  Some people report that the use of home made soap has relieved them of itchiness, dryness and skin conditions such as excema, psoriasis and acne.

4.  Infinite number of recipes.  (Well, not infinite, but you get the drift.)  You can tailor what recipe you use based on what your skins needs are at the time.  If they change, then you can simply change the ingredients you use.

I could go on but reading about an arm's length list of benefits gets boring for some so...

On with today's project.

DIY Small Activity Caddy


Materials


1 - 1x6


NOTE: All board lengths are 8' long and 3/4" thick unless otherwise noted.

Choice of Stain


Cut List

2 Sides @ 4" x 16.5" or 102mm x 419mm

1 Bottom @ 4-1/8" x 16.5" or 108mm x 419mm

2 End Pieces @ 4-1/8" x 2.25" or 108mm x 57mm

Cutting Diagrams


1x6


Step 1

The bottom piece is cut to length on the miter saw and ripped to width on the table saw.

Then measure 1.5" or 38mm in from each end and route a dado for both end pieces.


Step 2

Cut the end pieces to length and width in the same manner as the bottom.

Make sure they are snug in their dadoes.


Step 3

The sides are the pieces that we will spend a majority of our time on. 

First, measure 1.5" in from each end and route corresponding dadoes as shown.

Second, measure up from the bottom 1" and route a dado the length of the board.

Now mark an X from one corner of the board to the corner the dadoes made and vise versa.  That will give a center point to drill a hole for the hardware.


Step 4

The hardware used is a 5" or 5.5" one quarter inch bolt with a flat washer and wing nut.  All of which will be available at any home improvement store.


Final Thoughts

Lining a wooden soap mold before use is essential to being able to get your soap out of the mold in one piece.  We use parchment paper to line our molds but if you are making a lot of soap then that may get expensive.

You can also use a plastic bag if you don't mind a few minor creases on the sides and bottom of your soap.

When it is time to take the soap out of the mold simply unscrew the wingnuts and pull the sides away.

Once the project is dry it can come out of the clamps and be sanded down.  A few coats of your choice of stain along with a few more coats of a project sealer such as some polyurethane will complete this awesome gift giving idea.

I hope you enjoyed our 12th Day of 12 DIY Christmas Gift ideas and the complete series.

Don't forget to check us out on Facebook and Youtube for more great simple and easy DIY projects.

Until then!


1

Sunday, December 11, 2016

DIY 2x4 Shelf with Towel Hooks


When I did this design I originally had a bathroom setting in mind.  Hence the photo above.

Then I got to thinking that it would like nice just inside an entryway.  You could take your coat off  when you come inside and hang it on one of the hooks. 

Place your gloves and hat on top of the shelf and have everything in place the next time you wanted to go out somewhere or...

Imagine it tucked just inside a walk in closet.  A night robe hung up so you could just reach around the inside of the closet and grab it.

It's a great stylish design that would look good in just about any room and can be purposed for so many different things.

DIY Shelf with Hooks


Materials

2 - 2x4s (Might be able to get away with just 1 if you have a few 2x4 scraps laying around.)

NOTE: All board lengths are 8' long unless otherwise noted.

Choice of Stain


Cut List

5 Shelf Slats @ 1.5" x 1.5" x 21"

1 Front Shelf Slat @ 1.5" x 1.5" x 24"

2 Shelf Side Pieces @1.5" x 1.5" x 8.75"
 
2 Vertical Joiner Pieces @ 1.5" x 1.5" x 8.5"
 
1 Horizontal Bottom Cross Piece @ 1.5" x 1.5" x 24"
 
4 Hook Pieces @ 1.5" x 1.5" x 3.5"

Cutting Diagrams

2x4s


Step 1

The first thing to do is too rip a 2x4 in half on the table saw.  Actually I should be more specific than to just say "half". 

2x4s usually have rounded corners to them.  Run each side through the table saw to remove this rounded portion.  Then set your table saw rip fence to 1.5" and you should be able to get two 8' lengths of board.  Each at one and a half inches or 38mm.

The bottom cross piece is the one that sits horizontal and gets the hook pieces attached to it.  Cut it to length on the miter saw and then take it back to the table saw and you should be able to cut all the slots you see below.


Step 2

The hooks are simple 3.5" or 89mm pieces with a 1/4" to 1/2" section routed out of them to create the hook on the end.

Again the easiest way to do that would be on the table saw.  However, don't cut each piece to it's 3.5" length and then try to cut that section out on the table saw.

Use a longer piece that you can get all four cut out of plus a few inches.  Set the blade height to around 1/4" or whatever height you want the hook part to have and run the piece across the blade using the miter gauge until you are 3.25" in from the end of the board.

Then take the piece over to the miter saw and cut a piece that is 3.5" long and whalahh!  You have one of your hook pieces.

Rinse and repeat for the other 3.

Then glue and clamp in place.


Step 3

The Vertical joiner pieces is what joins the top shelf to the bottom hook portion.  The photo below may look tricky but it isn't.

The miter gauge on the table saw can be used to cut the tenon shown on the top portion of the pic.

However, unless you have a tenon cutting jig for the other side you will probably just want to clamp the piece in a vise and use a pull saw.  A chisel will clean up the inside edges nicely to give a finished fit.

TIP:  Just remember to mark the waste portion of the material before cutting.  Since the cuts are 90 degrees to each other from one end to the other it can be a little visually disorienting.


Step 4

Now those pieces can be glued together with the bottom cross piece. 


Step 5

Lets start on the top shelf.  Again use the same technique you decided to go with in step 4 to cut this piece as well.


Step 6

Now glue the shelf slats between the side pieces.

NOTE:  Make sure you get the end mortise facing the right direction to be joined to the bottom section of the project.

The one thing here is to flush the slat to the end of the side pieces that has the joinery cut into it.  Space each piece 1/4" or 6mm apart and that should leave a 1/4" lip along the front so that when the next step is done the spacing between the slats will be uniform.


Step 7

Glue the front slat in place.


Step 9

Glue to two sections of the project together.


Final Thoughts

Once the project is dry it can come out of the clamps and be sanded down.  A few coats of your choice of stain along with a few more coats of a project sealer such as some polyurethane will complete this awesome gift giving idea.

I hope you enjoyed our 11th Day of 12 DIY Christmas Gift ideas.

Don't forget to stop by again tomorrow for another great project to help you with your gift giving dilemma's.


Until then!


0

Saturday, December 10, 2016

DIY Wooden Beer Tote


I am a huge NFL Football fan.  I mean I love the Kansas City Chiefs but I will watch just about any NFL game anytime.

Lazy Sunday afternoons you can just leave me alone.  I'll be cracking open a cold one and licking Doritos cheese off my fingers.

No need to make lunch or dinner.

The only thing I need is to be able to tote around a few brewskies.

DIY  Wooden Beer Tote


Materials


1 - 1x2 (1/4" or 5mm Thick)

1 - 1x4

NOTE: All board lengths are 8' long and 3/4" thick unless otherwise noted.

Choice of Stain


Cut List

4 Side Pieces @ 3.5" x 12"

4 Slats @ 1/4" x 1.5" x 11"

2 Bottom Pieces @ 3.5" x 10"
 
1 Dowel Rod @ 11"

Cutting Diagrams


1/4" Thick 1x2


 1x4


Step 1

The sides of our beer tote are two 1x4s cut to the length listed in the cut list edge glued together.

NOTE:  Good practice to get into when edge gluing boards is too cut them slightly longer than needed.  This will allow you to trim the project board to size after it comes out of the clamps.

Measure 2" in from both sides.  Then measure 5" down from what will be the top of the tote.  Mark a line to connect the dots and cut the angles on both sides.

Then about an inch down from the top and centered on the board drill a 1" hole with a forstner bit.

Finally route a 3/4" rabbet along the bottom edge of both sides.


Step 2

The bottom is an edge glued project panel as well.  Again you will have to trim to final size.

Then glue the bottom into the rabbets that you routed in step one.  A few right angle clamps will help keep the sides perpendicular to the bottom while drying.


Step 3

The materials list above calls for a 1/4" thick 1x2 project board.  You can purchase those in shorter increments than 8' at most home improvement stores to save some money and reduce waste.

However, you can also just take a 2x4 and rip a few 1/4" thick strips on the table saw.  This will save even more money.

Win, win.

Glue and clamp them along each edge of the sides.  I have them 2" apart in the photo below.

Glue should be ok by itself in this instance but you could also tack the slats in place with a few 5/8" brads if you feel like it. 

Dowels are another option to go with if you don't like the thought of marks being left by the brad nails.


Step 4

A one inch dowel rod can be cut to length and glued in place for a handle.

Alternatively you could omit the dowel rod and just attach a 2" piece across the top for the handle.

If you round over the edges it should be just fine.  It's all about what you are comfortable with.


Final Thoughts

Once the project is dry it can come out of the clamps and be sanded down.  A few coats of your choice of stain along with a few more coats of a project sealer such as some polyurethane will complete this awesome gift giving idea.

I hope you enjoyed our 10th Day of 12 DIY Christmas Gift ideas.

Don't forget to stop by again tomorrow for another great project to help you with your gift giving dilemma's.


Until then!


0

Friday, December 9, 2016

DIY Sofa Armrest Tray Table


Are you ready for some FOOTBALL!!...or maybe Baseball, Futbal (as they say in Europe), Soccer (as they say in the United States).

Heck, are you ready for some golf, tennis, Nascar or maybe even some dog show?  Well anything you can watch on TV needs an accompanying sofa arm table...or tray (as they say in the Midwest and three counties in Utah).  Hehe, that last part was a joke.
 
Today's project is all about the lounging...

and the eating.  Can't forget about the eating.

The joinery is simple dowel joints except for a few pocket holes that no one will ever see.  Unless you happen to be laying on the floor looking up for some reason, (I won't judge) hehe.
 
That makes this couch tray doable in an afternoon.

DIY Sofa Arm Table Tray


Materials


3 - 1x4

1 - 2x4

NOTE: All board lengths are 8' long unless otherwise noted.

Choice of Stain


Wood Glue 

Pocket Hole Screws

Pocket Hole Jig


Cut List

6 Table Top Pieces @ 3.5" x 18"

6 Bottom Base Pieces @  3.5" x 18"

2 Legs @ 3.5" x 36"

2 Middle Cross Pieces @ 3.5" x 13.5"

1 Middle Cross Piece @ 3.5" x 10.5"


Cutting Diagrams


1x4s


2x4s


Step 1

Cut the legs from the 2x4 and the shorter of the two middle cross pieces from a 1x4.

Measure up 17.25" from one end of each of the legs and attach this piece as shown with pocket hole screws from the underside.

This is the only place pocket holes will be used in this project.  The remaining joinery can be done with 1/4" or 3/8" dowels.

I like dowels for joinery because I of the visual appeal it adds to projects.


Step 2

The two longer middle cross pieces can be glued and clamped in place.  Allow it to dry at least half an hour, (usually the set time for most wood glues), and then you can drill the dowel holes.

Two on each side and three along the bottom where the side cross pieces meet the bottom cross piece should do nicely.


Step 3

The top and bottom pieces are edge glued 1x4s as determined by the cut list above.  Edge glue six 1x4s together and then trim the piece to the final size of 18" x 18".

The two pieces can be lightly clamped in place at the same time.  Gently position as needed to be able to reach over the arm of your couch and drill for 1/2" dowels from the top and bottom respectively.

NOTE: Alternately you could use plywood for the top and bottom.  Some edge banding that is readily available from just about any home improvement store or online can be purchased for just a few dollars..  Most are iron on and give a pretty good finished look to a lot of projects.


Final Thoughts

Once the project is dry it can come out of the clamps and be sanded down.  A few coats of your choice of stain along with a few more coats of a project sealer such as some polyurethane will complete this awesome gift giving idea.

I hope you enjoyed our 9th Day of 12 DIY Christmas Gift ideas.

Don't forget to stop by again tomorrow for another great project to help you with your gift giving dilemma's.


Until then!


0
http://www.simplyeasydiy.com/search/label/Beginners